Windows power plans seem simple, at least in theory. Launch the Power Options applet, then select "High performance" on desktops for maximum CPU speed, "Power saver" on mobile systems to optimise for energy use, or "Balanced" for somewhere in between.
That’s most how it works, too, but Windows also has a hidden setting which can fine tune the results, maybe saving more energy or further improving system speeds.
Core Parking is a CPU power saving feature which disables individual processor cores when your system is idle, turning them back on as activity picks up. This reduces power requirements, but may also cut performance as it takes time for cores to be reenabled.
Windows adjusts core parking settings when you choose a new power plan, but by default you’re not able to see or control them yourself -- and that’s where ParkControl comes in.
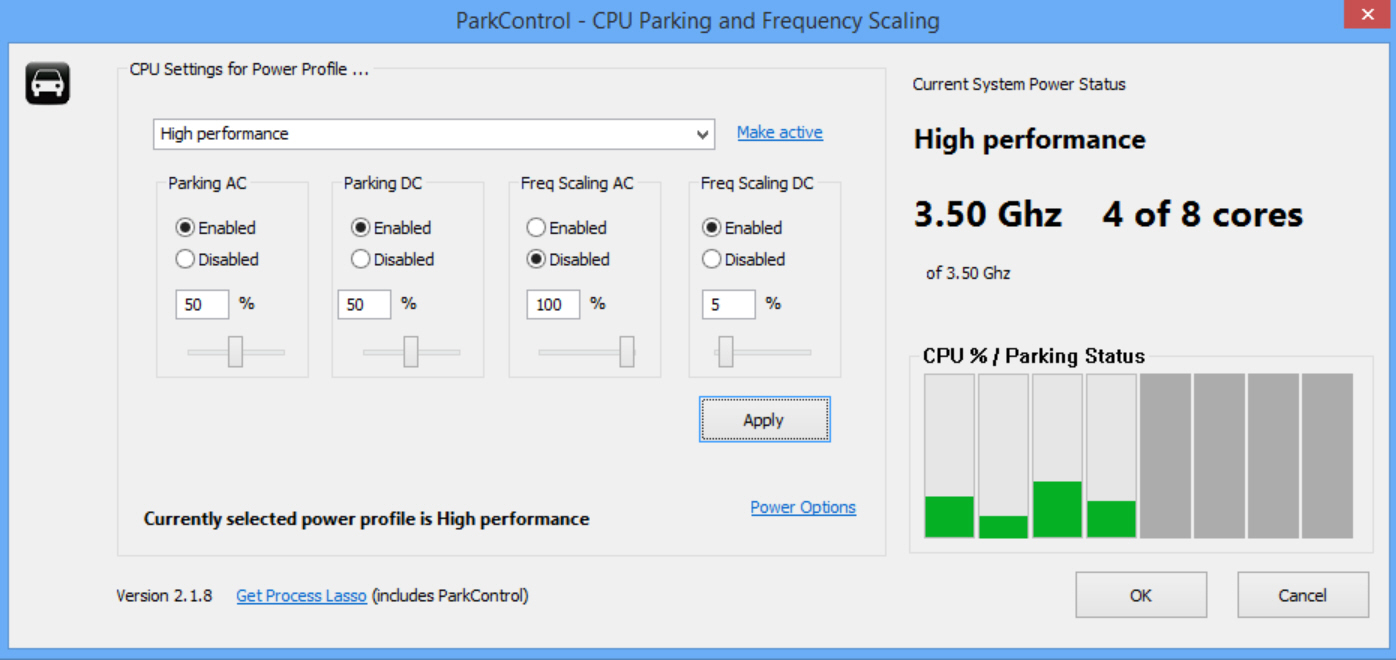
Download and launch the program and it displays the parking settings for your current power plan. If enabled, a live graph of CPU use will show you the results: green bars represent active cores, solid grey ones are currently parked.
At a minimum, you can now disable core parking to improve performance, or enable it to save energy. Click Apply and the graph should immediately update to show you what’s happening.
If you leave core parking enabled then you can fine tune it by setting the minimum cores that must remain active at all times. On a four-core CPU, setting this to 25 percent is mostly about saving energy (3 out of 4 cores can be parked), while choosing 75 percent gives you a little more performance (only 1 core can ever be parked). Click Apply again to change your settings.
Keep in mind that ParkControl can change the core parking settings for any of your power plans. If you tweak the Power Saver plan, say, and are currently using High Performance, then your adjustments won’t have any immediate effect. Clicking Apply > Make Active updates your settings, then sets the system to use your new power plan, enabling you to test for any changes.

